Friday, June 10, 2011

Entry Door Make-Over

Hello All! My in-laws came to see the play we were in and before they got here I realized that I had a few things left to do make our little basement apartment complete.  One of them was the entry way door. 


The window of the door looks right into the hall way, which has the entry of the bathroom just to the right there and our bedroom at the end. The other wonderful thing is that the Front door is just at the top of the stairs so anyone coming in could potentially see me running naked from the bathroom to the bedroom because i forgot...i dunno...something...make it up i don't care! Ok maybe it would never happen but you get the point! It could and so...it's awkward. I have been using a scarf, did hte trick of covering the window but didn't look very good at all. 

The sign I wanted to keep there because my cousin gave it to me as a housewarming gift and it's got a very sweet saying.

A while back though, I found a big ol' piece of burlap that just begged to be used for something like this. 


In retrospect, I would have spent more time measuring and planning but with it being the week of the play and dress rehearsals, i was really anxious and short on time.  Sooooo i winged it and just started drawing the letters.

Like that yellow nail polish? for the play lol

 Of course, it was off center so i added a little something at the beginning to even it out...


 Which, it turned out, didn't even matter because this is how the door framed it anyway:


 I should probably iron it.... but it looks better than the scarf! yay!

Tuesday, June 7, 2011

The Prince is Giving a BALL!

So my husband and I signed up to be in the local community college's musical and it is A LOT OF WORK HOLY CRAP. Mainly because I had the great idea of helping with props too. Well we open TOMORROW (ACK!!) and my brother's wife is having her c-section tonight (oh gosh oh gosh oh gosh) so i am like a ball of nerves right now. Anyway! I thought you'd like to see some pictures of the fun props I have been making instead of crafting lol

 I didn't make the cart but i made the food!

They wanted a bright yellow power suite so i dyed this
baby and found these shoes at the salvation army

masks...


masks...

...and more masks!
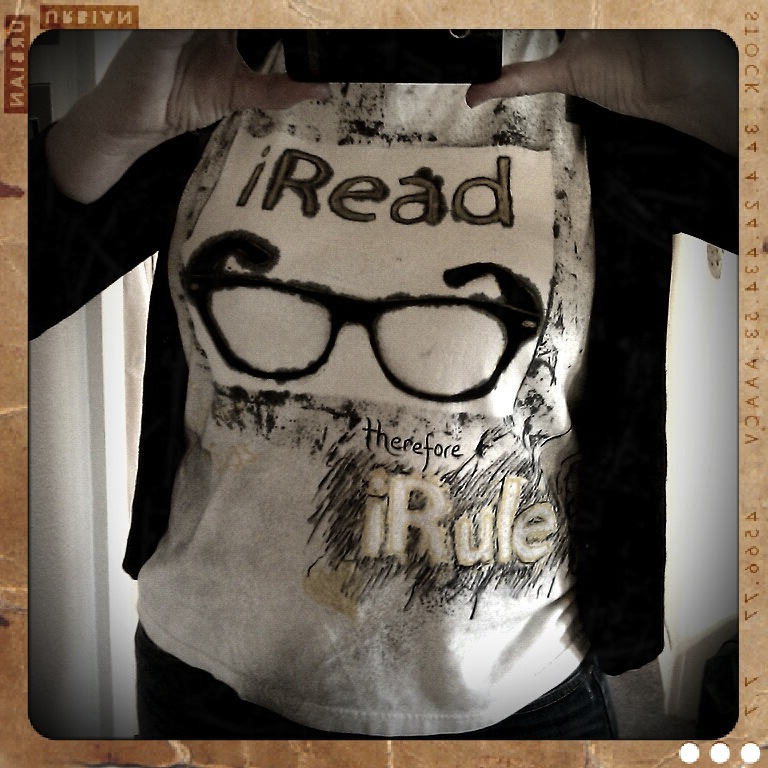
Hello fake ipad...
or should i say iRule? :)
Comical Corsages
Waxed wine bottles
Copper wine glasses
fimo food! chocolates and shrimp cocktail

A photo of the royal family for a newspaper mock up

Monday, May 30, 2011

Vegetarian Mango Chili

So you say you just got out of church (so its noon) and invited to a potluck (its at 6pm) and you have your cousins graduation party (from 2-5) so you can't really cook without giving yourself a nervous breakdown? Wow, me too!! Luckily, I have a crockpot.

I SWEAR I tried to go by the book this time. I knew I could pull off a chili because I knew I had a lot of the stuff needed in the pantry. No shopping, easy peasy. I pulled out a crockpot cookbook, found a recipe and everything....but... the can of diced tomatoes smelled like vinegar. Hmmm. I had one big tomato to work with. However, we did just get our produce basket the day before so I had 5 mangos staring at me just waiting to be used.

Can you even use mango in a chili? Turns out you can! Yay for the interwebs! I googled but I was running out of precious prep time. I was going to have to do what i could with what I had, cross my fingers and hope for the best! I am happy to report that it turned out really good :) there wouldn't be a blog if it hadn't though so that should have been the first clue LOL Here's what I did:

Vegetarian Mango Chili
2 cans kidney beans
1 can black beans
1 can olives
1 16 oz can crushed pineapple
2 mangos
1 medium onion
1 large tomato
2 tomatillos
1 c. water
 1 tsp chili powder
1 1/2 tsp cumin
1/2 tsp salt
1 can enchilada sauce (about 12 oz)
1 small can green chilis

Dump in all the canned stuff. Cut up the mangos, onion, tomatillos & tomato throw it in the blender with the cup of water (because you don't have time to dice! at least i didn't. You can dice if you want.) use the chop setting just long enough to get it somewhere between liquid and chunky. It was literally only a few seconds for me. Dump that in to the pot, put in your seasonings, stir it all around and cook on low for 5-6 hours.

It went over very well with the BBQ chicken, even the hubby liked it and he's the traditionalist :) Enjoy!


Visit thecsiproject.com

Saturday, May 21, 2011

Overhaul the Overall


How fun is this?! My aunt got these at some yard sale and gave them to me for the play, but then the costumer said i didn't need them. What to do? This involved no sewing, because I have no sewing machine right now. SO I used Fabri-Tac. This glue is quickly turning into some of my favorite glue EVER. I discovered it while getting all those crafts done for my wedding as I was desperately looking for an alternative to the danged glue gun (sorry, glue gun, but you burn my fingers and when I am doing 30+ flowers, the blisters on the thumb get a little old...).


This is the original look of the overalls. Now.... It's not that I have anything against the flag but I like something a little more versatile. I would like to wear these more often than a handful of patriotic holidays. Hope this doesn't offend anyone. But I decided to cover it.


I grabbed an old shirt and some jean legs for some texture and shade differentiation, but versatility was the goal so I didn't want to stray much from the "jean blue." Loved the ratty edges too!


I cut the hems off, so i could use the texture and ratty look.  I cut the hems in half, which was enough length to cover the flag.


You can barely see it, but I drew a heart with blue pen on the jean and cut it out.


Frayed the edges a little.


Cut out a circle from a different park of the leg, a smaller circle from the blue shirt, and then a frayed bit to top it all off.


The shirt had a tie on it that i cut off and glued in a more whimsical way across the very linear hems covering the flag.


I cut out some leaves to go with my flower and glued those down next.


Then came the flower.


And the look was complete! The whole thing took me two hours, but I was also watching a movie with my hubby while i made it so it's not like I was super focused or always working on it :)


He says it's very me :) and I have to agree! Definitely a winner and i can't wait to wear them in the garden.

Friday, May 20, 2011

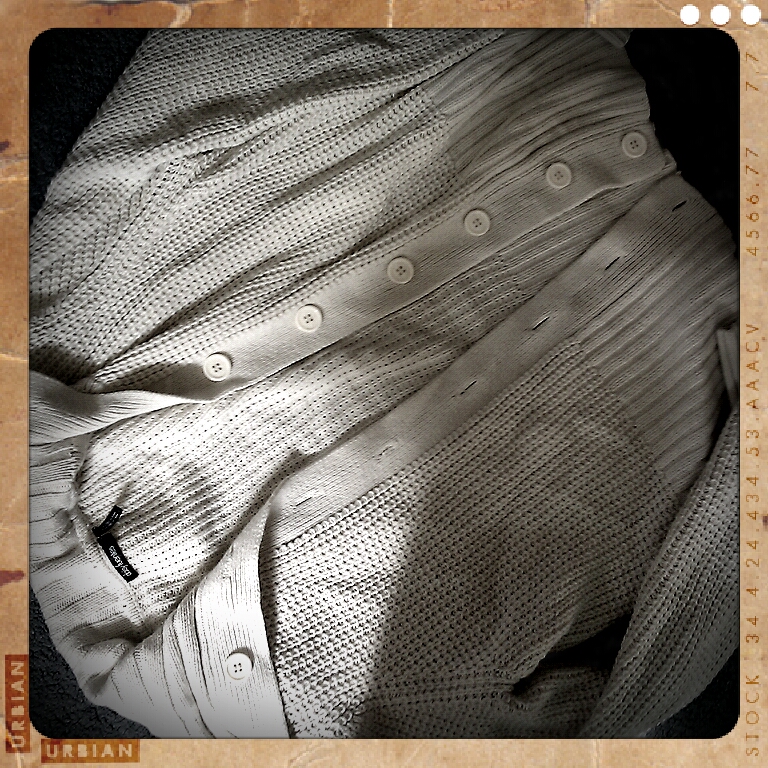
Dipped Sweater

I am still working on props for that play, and we needed a pillow dyed orange and maroon. Well, why waste some perfectly good dye when I have a plain old vanilla sweater just aching for a make-over? This might be looking a ahead more to fall BUT i had the dye NOW so you do what you can yeah?

The Original
The Orange Dye

The Maroon Dye
Since I had the maroon in a bottle of dye rather than a box, I had more control on how much I used and I knew I wouldn't need much. So I poured about 3 TB in to this 2 c. pyrex and filled the rest with hot water. Then I commenced the dipping.


Now I am sure there is a proper way to be doing this that you can look up online etc. but I had...six more props i needed to complete in about 4 hours so I didn't exactly have time to research properly. My bad. So what I did was 1) think about how far up I wanted color to go and then 2) dipped the sleeves in to that height, let it sit for a bit, about 5 min.  and then pulled it out, so that there was more of a progression of color, rather than a solid line of it. Since I wanted that brighter I let it sit for 15 min. I did the same thing with the base of the sweater.

Then I added the maroon.


For the maroon, I only wanted an accent, so I dipped the sweater just over the cuff on both sleeves and the base. I didn't let this sit in the dye too long, but i did wait to rinse it. Sweaters are really absorbent so the color stayed in the knit without me having to keep it in the dye. This also made rinsing take a reeeeaaaallllyy looooong time. Just as a heads up.


When you rinse, keep in mind that the dye is going to get all over the rest of the sweater unless you are very careful about how you rinse it, doing it in chunks and keeping it segregated so the color doesn't go whee you don't want it too. I also found that when sticking items in the dryer rather than letting them sit to dry, the color will travel onto other regions of the clothing. I was ok with this, and considering my time schedule I didn't have all afternoon to be super picky about it anyway. I think it turned out all right in the end :)

Monday, May 16, 2011

T-Shirt Stencil: iRead T-shirt

"Anyone who has never made a mistake has never tried anything new."
— Albert Einstein

I think i could read quotes by Mr. Einstein all day. This quote applied very nicely to this particular project. I am currently involved with putting on a play, something I have never done really, unless you count the time I was in drama in 6th grade. You shouldn't, I don't. I am not only in the production, I am helping with the props team, which means getting to use my creative craftiness in unusual ways. Its been quite fun and rather testing. Last night, I tried doing yet another technique i had never done before but had been itching to try. Using spray fabric paint with a stencil to do a shirt design. 

The concept was that one of the characters in the play is a complete book nerd,  so the director wanted him to wear a shirt that said something like "iRead" on it. So I came up with this: 


Printing this up, I taped it to some stencil plastic, cut it out and then laid it on the shirt and sprayed away. This happened:


/sigh

Too much paint resulted in a sort of bleeding into the fabric. AND I obviously had a lot of splatter going :) SO the next time I used plenty of paper to cover what I didn't want to get sprayed and did two "coats" so to speak with the spray paint. It came out a lot better : )


In the future, I would probably not cut it so close when it came to the sizing of the design on the stencil. I pushed it to the limits because the design needs to be readable from a stage. But as you can see the edges were harder to keep clean with out much of a border to overlap. 
Now, my momma always told me "waste not, want not" and it seemed a shame to waste a perfectly good shirt just because the bleeding made it less legible on a stage (and being a nerdy lil' bookworm myself I'd was just looking for a great excuse to rock this shirt anyway, lets be honest) so i figured a few adjustments and this could still be a great t-shirt!

First, I busted out the old fabric paint pens I had from the wedding (yellow! yay!! and some black, perfect) and then trolled the internet for some quotes. I chose these selections:


Reading
A story is a special thing
The ones that I have read
They do not stay inside the books
They stay inside my head. 
-Unknown

"If you want your children to be intelligent, read them fairy tales. If you want them to be more intelligent, read them more fairy tales."
— Albert Einstein

"The more that you read, the more things you will know. The more that you learn, the more places you'll go."
— Dr. Seuss (I Can Read with My Eyes Shut) 

It's hard to see in this pic but the Einstein
is there around the star, the poem is in yellow at
the bottom.

Then I attacked the shirt with creative vigor till about 2 am. And I honestly didn't even like it when I went to bed. I felt rather defeated. I didn't give up hope though. I tried it on this morning and TA DA! I loved it. Sometimes you just gotta try things on to really know :) 

Wednesday, May 11, 2011

What to do with that birdcage....


I am showing the end product! I never do that really...anyway. I had this birdcage, just the birdcage, from my wedding. We used it for gift cards. Now, i don't really get gift cards en masse, as you can imagine, so the cage needed a new look. While it pretty much involved shoving different items into the cage in a pretty way, I wanted some height to it as well. So I picked up one of these green foam ball things: 

I measured a hole in the top and carved it out so that i could nest something into it.

Then I used glue to stick moss all over the ball.
 Now since I was planning to hang this, i made sure the bottom had moss too. The moss added to the dimensions a bit so i really had to stuff the thing in, make sure you think ahead on that, unlike myself :). Cute huh? and really easy too. Once the moss ball is in there, just nestle a few decor items in the sides and on top (flowers, ribbon, necklaces, vase, an old clock face, a framed quote, etc.) and TA DA!
Related Posts Plugin for WordPress, Blogger...