Monday, August 29, 2011

The Bleach Pen Strikes Again!


Can you see it?? I know it's really subtle, I had a hard time getting a picture. Having explored the stenciling method with fabric spray paint and then the free handed bleach pen method, I decided to combine techniques of the two and make a stenciled bleach pen shirt. I thought long and hard about what shirt to use but the winner was this long pale yellow t-shirt that I found at a thrift store a while ago. 


With nothing to break it up, it's just a little too long on me (and that's rare because I have a long torso) and so even though there's a lot to love about it (check out the cute accent in the back!), I never wear it. I just wasn't sure how to accessorize a shirt like that... Plus I loved that the bleach effect would be a subtle enhancement of the shirt. 

Step 1: I made a cardboard bow wear the shirt so the bleach wouldn't bleed through to the back. 
Step 2: I Decided where I wanted my pretty floral stencil to go. 
Step 3: I used the bleach pen to go over the stencil. 


Step 4: Once I got that far, I noticed the bleach at the endges of the stencil didn't have a clean look to them so i used the pen and free handed some doodles of leaves and flowers that matched the general scheme of the stencil. 


It didn't take long for the color to fade, this is a bit more time consuming a process than just free handing it altogether. You want to make sure you get all the little cracks so it doesn't just look like a shapeless- blob of a bleach stain on your shirt. 

Step 5: Rinse the bleach off the shirt and dry it.
Step 6: Rock it like it's hot :) 


Friday, August 26, 2011

Fry-Day! Eggplant Fries and Fried Chicken Tacos


Some neighbors gave us a bunch of eggplant. I am not against eggplants but I don't love it either. Still, waste not want not, I needed to figure out a way to use this stuff without getting to sick of it. On pinterest (DON'T YOU FREAKING LOVE PINTEREST?!?!) I saw this recipe for Eggplant Fries by Use Real Butter.


Hers look a WHOLE lot better than mine, but never mind that. I have never fried anything in oil before /shrug. So I am ok with it, they tasted very nummy and that's what matter more! Because that means someone besides Grandma will be eating them! (I made mine gluten free using GF flour.)


Seemed like such a waste to not use the oil and the seasoning up completely (Grandma is rubbing off on me) so since some chicken was thawed out in the fridge, I broke an egg in a plate to use to coat the chicken in and then seasoned and fried that up too. 


Well heck, while I am at it, why not fry some corm tortillas?


Chop up some tequila peppers and green onions, add some mango salsa and you've got some tasty tasty tacos! I did fish sticks for Grandma though, it's fish friday after all. 


Monday, August 22, 2011

Bleach Pen Yoga Wrap

My sister-in-law is pretty fantastic, she does dance pilates, yoga.... and she is much shorter than me :) so when I find a cute top that won't fit me, guess who I think of! She has recently had her third mini-human and I was thinking maybe she ought to get a nifty gift rather than the little guys always getting all the loot! Mom's need some lovin! SO I tried out this new fangled technique I have been seeing around the interwebs. All you do is use a paint pen, draw your design, let it sit till its the color you desire and then rinse it off and wash (make sure the bleach chunks don't get stuck on the shirt when you rinse it!) Came out pretty good! Pay no attention to how tiny it is on me :) lol


Thursday, August 11, 2011

Wall Folder for the Hubby


Our room is on the smaller side. Our bed (a hand me down) is on the bigger side. So it's jammed in a corner and my husband doesn't really have an end table. The catch-all on the dresser gets just about everything, but he likes to keep his phone by him as his alarm clock and then his glasses need a home too. At first, I had this really cute little shelf with molding and such...but then I thought about how he doesn't always full wake up (he's a hard sleeper) and how that could equal him bonking his head :( I decided sharp corners was a bad call. Then...I found this: 


 Yay PeeChee! Our room is blue/yellow/grey/b&W. And Hubby loves sports. So. 
I put the Folder inside out and folded one side like so:


I took some gorilla glue and glued the sides and corners


Clamped it down with paper clips. 


Let it dry overnight or whatever...


And then tacked it to the wall!


Use.


Tuesday, August 9, 2011

Tipsy Tuesday: Laundry Detergent


Hello :) yesterday I made my own laundry detergent for the second time (yay me!) and I thought, "You know what, not everyone thinks they can do this sort of thing but it saves so much money!" So even though this isn't some new recipe of mine, I thought I would write about our experience on it and hopefully encourage you to give it a try as well. Here's a quote from the site I found (The Simple Dollar DIY Liquid Laundry Detergent Recipe: A Visual Guide), just to get you thinking:

"In other words, nine loads using my homemade detergent has the same detergent cost as one load of Tide with Bleach Alternative." 

If you go to the link and read the article, the guy does the math for you (and thank the Maker because I really hate math) not to mention a whole stain test to boot, and it was up against the top pick by Consumer Reports.

If you don't like liquid detergent then there are also a bunch of dry versions out there and you're probably looking at a similar cost ratio. My grandma likes the liquid stuff and we don't care either way /shrug. Personally, I kinda like that I don't have to use a magic bullet to get my soap shreds all tiny, which is seems you have to do for the dry stuff, but to each their own for sure. 

I don't regret it a bit so far, months down the line. It gets the clothes clean, no one's had any skin itchiness (even my aunt who has sensitive skin with detergent is handling it just fine). Because the article has so much information in it, with all of the pictures and the math etc. it seems really complex but when you just look at what you have to do? super easy. took me....30 min. tops. tip to toe. well apart from having it sit for 24 hours, but you get what I mean :) I will even copy and paste it here so you have it, but go to The Simple Dollar for the pictures and video: 

Laundry Detergent

1 cup washing soda (I use Arm & Hammer)
1/2 cup borax (I use 20 Mule Team)
1 bar soap (I use whatever’s cheap, in this case Pure & Natural)
Approximately 3 gallons water
You’ll also need a container of some sort to store this in (I use a five gallon bucket with a lid), something to stir it (I use a large wooden spoon), another pot to boil soapy water in (I use the pot in the picture), and something to cut up the soap (I use the box grater in the picture).
First thing, put about four cups of water into the pan and put it on the stove on high until it’s at boiling, then lower the heat until it’s simmering.
While it’s heating up, take a bar of soap and cut it up into little bits. I found a lot of success using our box grater, which resulted in a ton of little soap curls.
When the water is boiling, start throwing in the soap. I recommend just doing a bit at a time, then stirring it until it’s dissolved.

Stir the soapy water with a spoon until all of the soap is dissolved. Eventually, the water will take on the color of the soap you added, albeit paler. I used Pure & Natural soap for this, which was a white soap that looked a lot like a bar of Ivory.
In the end, you’ll have some very warm soap soup.
Next, get out your large container and add three gallons of warm tap water to it. I’m using a bright orange five gallon bucket that I had lying around.
To this bucket add a cup of the washing soda and the soap solution you made and stir. The borax is optional – some people say that it’s too harsh, but I’ve always found that it did a good job getting clothes clean and fresh smelling, so I recommend adding a half cup of borax to the mix.
After stirring, you’ll have a bucket full of vaguely soapy water.
Don’t worry if your batch doesn’t match the color of my own – it varies depending on what kind of soap you use. I made a batch with Lever 2000 in the past and it had a greenish tint to it, and I’ve heard reports of all kinds of different colors from other people who have tried this.
At this point, let the soap sit for 24 hours, preferably with a lid on it. I just took our bucket to the laundry room.
When you take off the lid, you’ll find any number of things, depending on the type of soap you used and the water you used. It might be firm, like Jello; it might be very watery; it might even be like liquid laundry detergent. Just stir it up a bit and it’s ready to be used.

Wednesday, August 3, 2011

Upcycled Pencil Skirt


So I made this skirt :) Totallyloveit. And its a no sew! (I KNOW RIGHT?!)

Remember this?

My lovely opening scene costume for a play. Wow. Never have I harnessed the fashion powers of Dick Tracy before, but hey! Now I have a solid yellow dress and jacket that I will wear EVERYWHERE right? Not so much. So what to do?

I grabbed this shirt that is (of course) too tight in the boobs, and kinda getting discolored anyway.


And I put on the dress, figured out where i could cut it that would make a comfortable skirt length for me, along with some seam allowance. Aaaaaand cut. This is where I messed up and didn't think "Hey you really should unzip it first so you can still use the zipper part!" so the zipper doesn't work. You should probably be smarter. Luckily, it still goes on just fine with a little shimmy dance.


Next I turned the skirt inside-out and I took FabricTac and glued the seam down, using clothes pins to keep it down for a bit. While that dried, I started in on blending the two items. I ripped the seam on the back of the skirt about 1/2 way up and glued the seam and tip.  I then figured out how much of the ruffle I wanted at the base of the skirt, as well as how much would be needed to add to the seam I just ripped. (it REALLY helped that the skirt and shirt had the same diameter at the base.)  And cut then glued. (see below)


Once the glue dried, it was ready for action! However my camera was having trouble with the crappy lighting. I really ought to wait and have my hubby help me take picture but I get all excited!!! 


Have you ever tried to take a picture of your own butt?? It's really rather awkward. 


YAY! I love it, it's a length that isn't uncomfortable now and it's that much more fun. The white cuts the yellow back a smidge and makes it more bearable. Although I do really enjoy my yellow. 

Tuesday, August 2, 2011

Long Distance Birthday Cake

It's my birthday!!! Yay for 30 years of life. It's not so bad as I thought. I have been thinking about turning 30 for two years, not even kidding. It has been so bad that i started saying i was 30 even when i wasn't. But now I will be right! that's a load off.

We recently moved a state away from our families (well the parents and some siblings) and so this is the first birthday away in a long while. I have to give it to my inlaws, they are "gifters." IIIIIIII am NOT. My family hasn't done gifts for about five years, basically the coming of the first grandchild. We all agreed we didn't have enough money to get everyone gifts for the holidays so gifts for the kids was ok but nothing more than well-wishes was expected. So guess who has really sucked at this whole long distance gifting thing? ME. But I am determined to learn a "new language" so to speak and become a gifter. Hopefully in time for the holidays. 

All this to say: ISN'T THIS CUTE?!?


They sent me a birthday cake! Well, they sent me everything to make it :) including the gluten free cake mix! NOM. The candles came from Grandma, along with an apron and oven mit. The mix and frosting were inside the pan (still not sure how they did that AND kept the paper on the outside, still glued to the pan. Magic.) and it was just all very fun :) If you read this: THANKS BUNCHES!!

I got other gifts and well wishes of course (yellow Chuck Taylors from my hubby TOTALLY made my day!!) but i thought this was the kind of creative idea others could find handy for their long distance loved ones. Have a great day!

Monday, August 1, 2011

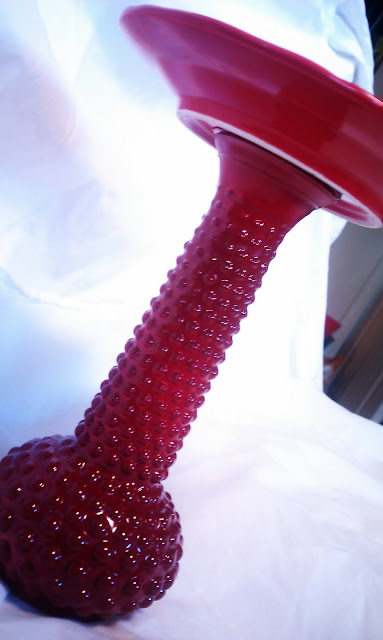
More Cake Stands....kinda....

These are smaller, so really more like a cupcake stand or display, but fun : ) I found red plates at the local thrift store, so I didn't have to worry about food safety with them, but the blue and yellow are going to be either finished off with some food safe paint or used with doilies.
 Go here to find out how I made them. 


Related Posts Plugin for WordPress, Blogger...