Showing posts with label bathroom. Show all posts

Wednesday, June 22, 2011

Tipsy Tuesday: Body Wash

I have sensitive and dry skin and so does my husband {which means the kiddo's are doooooomed}. So it's really tempting to try every label on the rack to touting a new ingredient promising to make my skin hydrated! but do i yield?!? well, ok, i did for a while but now I have discovered a new method.

Now just as a side note, I used to make soap so I know it's possible to make my own stuff. For the record, I was working around a couple of different factors:
1) we are trying to get out of a mountain of debt (who isn't!?) and so the less I spend the better
2) The dollar store is always nice for cheap alternatives BUT I really wanted to cut down the toxins I was putting all over my largest organ (my skin).
3) Less toxins is better for the environment too, double win!

So what I was looking to accomplish really needed to meet all of these requirements and that's not easy to do. Lucky for me, Tree Hugging Mom had the answer! I am going on a couple of weeks now and I cannot complain a bit. It took some extra thought process to order the soap on amazon (not that you have to, I just didn't have a store nearby that carried it) but that was about it. Go to this linky for her blog entry OR I did a little copy/paste of it below for your convenience (you really should check it out though she's got lot's o great green info): 

************************************************************************

DIY: Homemade Body Wash


We’ve been using the following recipe for a few months now and I don’t think we will ever change.  It’s so easy to make.


First, get yourself a good sized pump bottle.  I recommend a pump bottle because the finished product is a little watery.  We just repurposed an old baby wash bottle and removed the labels.

Fill it half way with Dr. Bronner’s Unscented Baby Mild Castile Soap.  Fill the remaining with plain old water.  Voila! You have body wash!


And, if you like a little fragrance in your soap, you can add 15-20 drops of your favorite essential oils.  We chose a blend of Sweet Orange and Lemongrass.


Now, you may notice your skin feels a little tight at first, but I assure you that will go away after a week or so.  Your skin just has to get used to not having all of the added chemicals found in commerical products.


Plus, this stuff lathers just as good as the store bought washes and I have found that if you shut the water off while lathering, you won’t need to use very much at all (and you’ll be saving water too!).
UPDATE: I just tried the Dr Bronner’s Almond Castile soap diluted and I LOVE the smell!  Plus, no need to add Essential Oil (money saver!) ;)

************************************************************************

It's easy, it's cheap, and my skin has no complaints! I give total props to this lovely lady for such an easy tip {now i just need to fix that lotion situation...hmmm}:

Friday, January 21, 2011

My Bathroom Makeover: Complete

Hello World! Ah, it's a beautiful day...why? because when I walk into my bathroom I see nothing but cuteness. I have spent all weekend scouring thrift stores, the hardware store, craft stores.... and last night, my husband helped me finish putting up shelves in both the bedroom and bathroom. You don't get to see the bedroom one's yet, the room's not ready, but the bathroom is one mat away from being done!

Here's some before shots:

My Aunt's grandsons' cat attacked this thing i guess...

See the lantern and the glass boat? Thrift store =D

Organized but not pretty

Yay for bottles that don't fit in cabinets!....

just cleaned my brushes :)
So, as you saw hints of, I had decided to do some sailboat theme's. I thought some hints at the nautical would give me some direction and work well with the yellow towels. I think I would have loved to do sea glass but the yellow just wouldn't have gone. And my aunt made those monogrammed hand towels with bold blue thread so that really wouldn't have worked. Another time maybe. But I like sailboats :) not so much to collect them but I enjoy them and they remind me of the bay's where I grew up. So I made a list of what I would need to change in order to integrate that feel, as well as some red and more blue.
  • new shower curtain (the one left here is beige)
  • cover the rip in the towel bin
  • new bath mats
  • cover organization boxes
  • shelves
  • baskets
  • rope accents
That was where I started. I went to the local thrift store and found this (as well as that cute lantern and boat cologne bottle you saw there):

Perfecto! Then I went to hardware store and bought some twine, rope, wire and super glue. Another trip or two to other thrift stores led me to some awesome little metal pails for putting things in, a wooden shelf that looks like it belongs on a ship, a mat for around the base of the toilet and a frame. I had to give up and go to target for the shower curtain because by that time I had such a specific idea of what I wanted i just wanted it. Now. Ever have that moment? So i broke and i don't much regret it because I got a finished bathroom! YAY! Here's the after pictures :) 

The whole shebang....as much as i could through the door...


Now for a close up or two...


Lucky for me we got a calender with this "painting" on it's envelope. Win.


Hair doodad's up top, make-up down below.

 *These hanging baskets were inspired by Be Different, Act Normal, just oh by the way.

Think i might put some cute letters on this. When I'm not so tired.

In case you missed my other entry about making these cute guys :)
The pictures don't do it justice, i suppose, but i freaking love my bathroom. Everything has a little spot and clean up is oh so much faster! The bedroom is next to be featured, it's been making some progress. It's nice to have things actually feel like a room! Tomorrow is the big day, you know, if it doesn't rain. Like it is right now. Grrrrrr. Normally, I love rain, but right now it is preventing me from having all the stuff i have waited YEARS to have out of storage and so.... 

Rain, rain, go away. 
Please?
One Saturday afternoon is all I ask. 
Thank you.


Tuesday, January 18, 2011

My Bathroom Makeover! How To: Cover Mini Milk Crates

I've had these mini milk crate things for years. I think maybe 5.


They got me through college :) and now they are a pretty perfect fit for the shelf that was left in the bathroom but they are kinda ugly. And not in my vision for the motif at all. So I decided they get a make over. To do this, I gathered up:
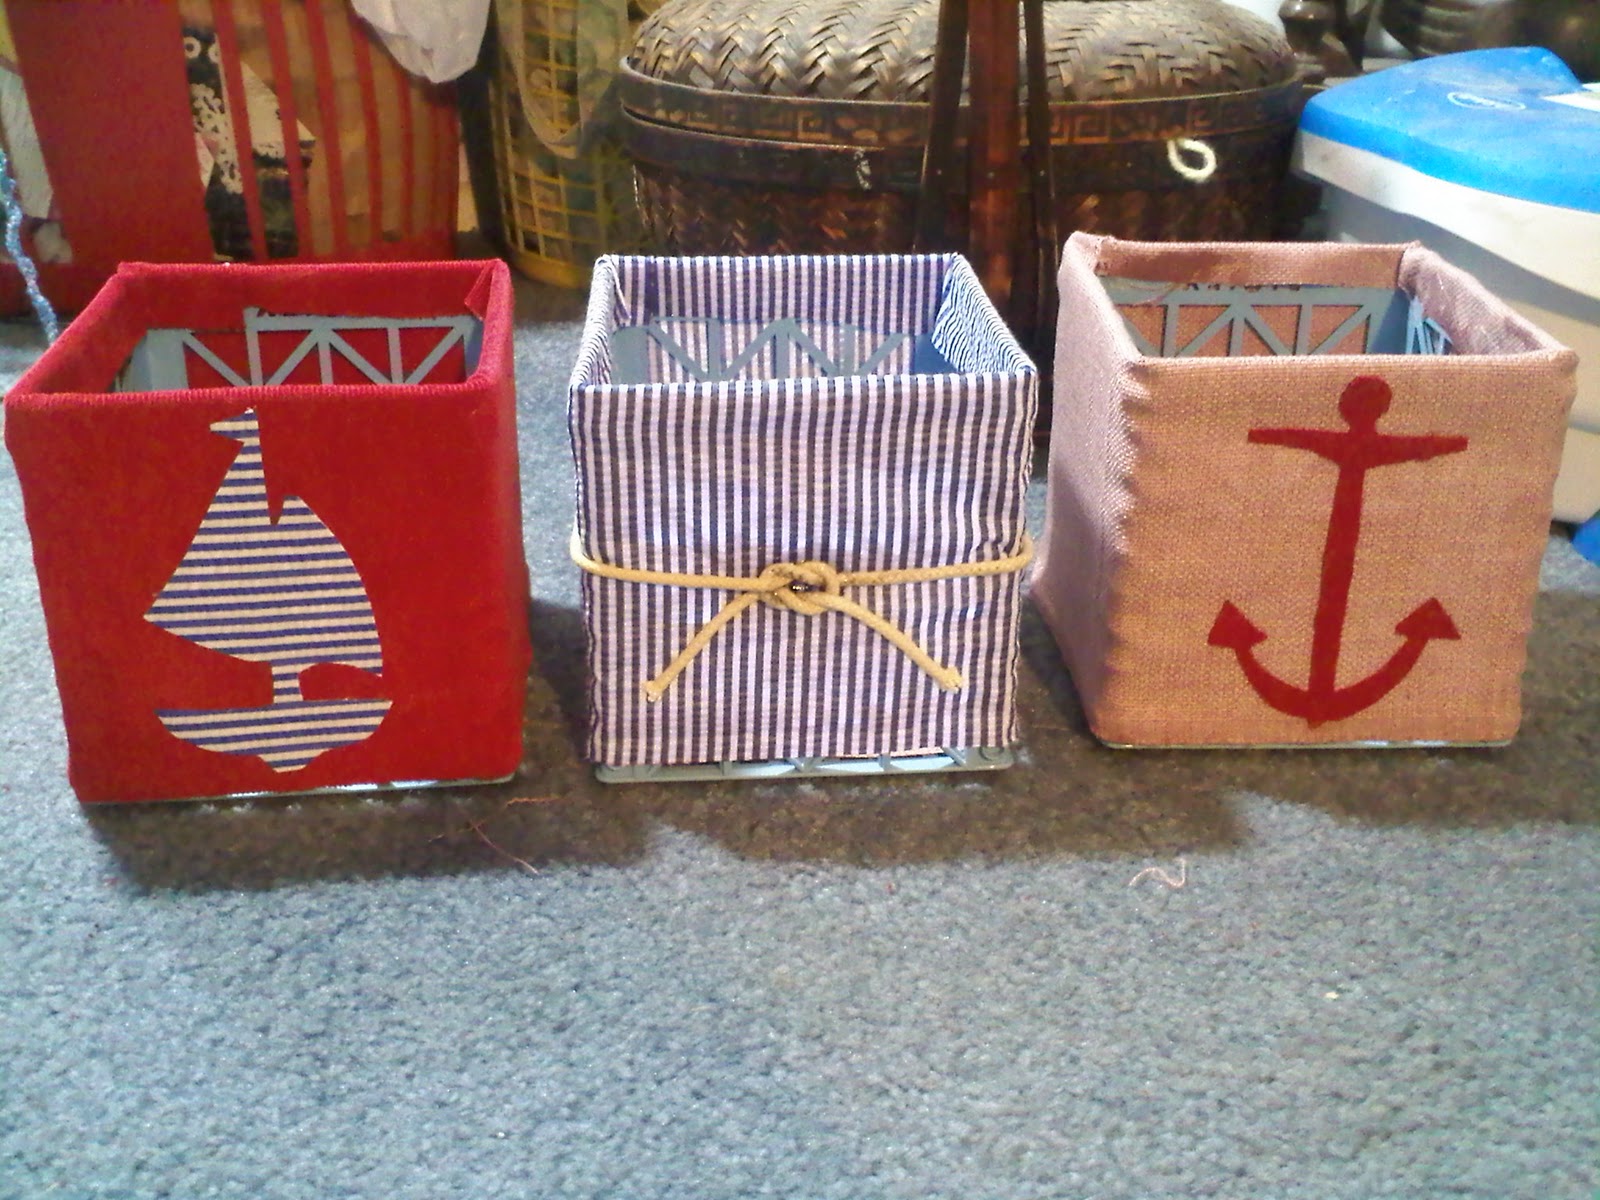
I had three containers, so I chose three complimenting fabrics. I have already used one of these fabrics to mat a picture for the bathroom as well. I measured the boxes height, added an inch for folding over the top edge, and then cut enough to wrap around the box entirely.


Then, using the Loctite glue, I glued the beginning of the strip to one side of the crate.

(By the way, you're not going crazy, I took different pictures with the different fabrics.) I let this dry for 30 min. or so. I then wrapped the crate with the rest of the fabric and glued the other edge down. I then tucked the remaining fabric down over the top edge of the crate, gluing it to the inside. This was trickier, I really wish I had thought to get clothespins the other day! The only problem with the Loctite glue is that it takes a while to dry, so I had to use what I had to hold it down: masking tape. Yeah.... not ideal. But it worked! And that's what matters.


As this was drying, I made my stencils. First, I looked up the images online, then using scrap paper, I drew them with the marker, making sure the silhouettes were solid enough to be cut out of fabric without too much trouble. You can probably achieve this exact goal by simply printing something out, but I don't have a printer right now (it's in storage). Then I took the paper, placed fabric glue on the back, placed it on the backside of the fabric I wanted to cut out, and let it dry. Once it dried, I cut out the stencil/fabric.


Sorry the picture's aren't so hot. I used my cell phone :P. Hey, I am excited and wanted to get it going! Well, that and I was doing this on Grandma's floor, chatting with her while she crocheted. I didn't want it to be in her way too long.

Next, I glued these cut outs onto the crates, and they looked like this:


YAY! I love 'em. And here they are on the shelf, OoooOoooooooo


More to come! The bathroom is almost done and I cannot wait to show you :) Till next time!


Visit thecsiproject.com
Related Posts Plugin for WordPress, Blogger...